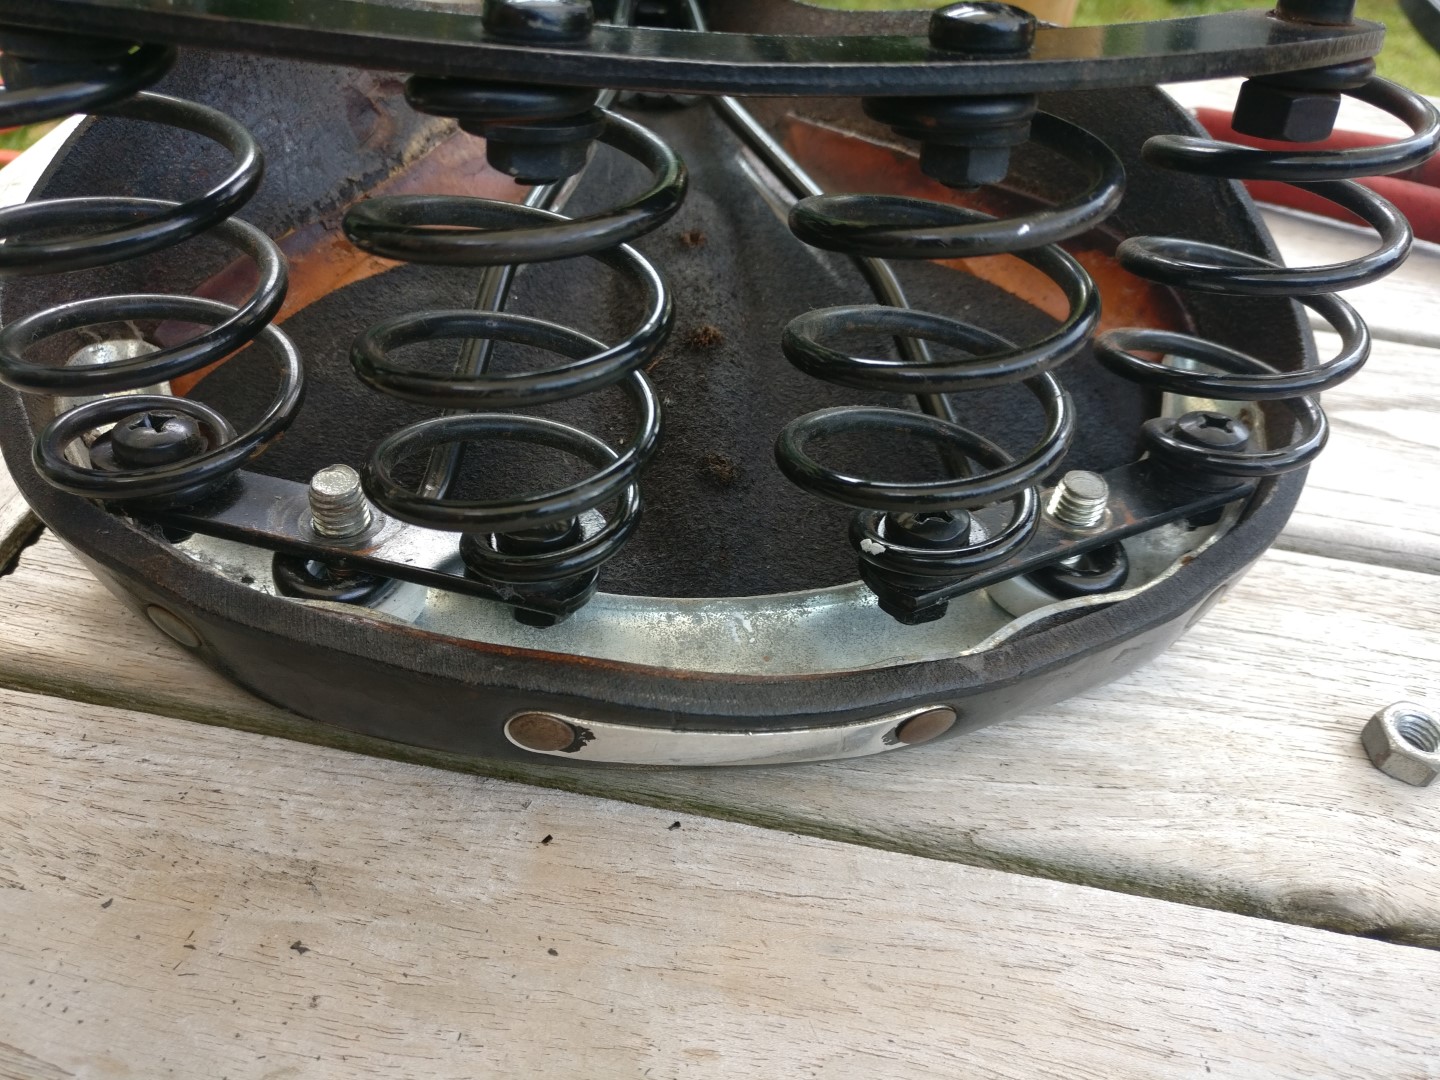
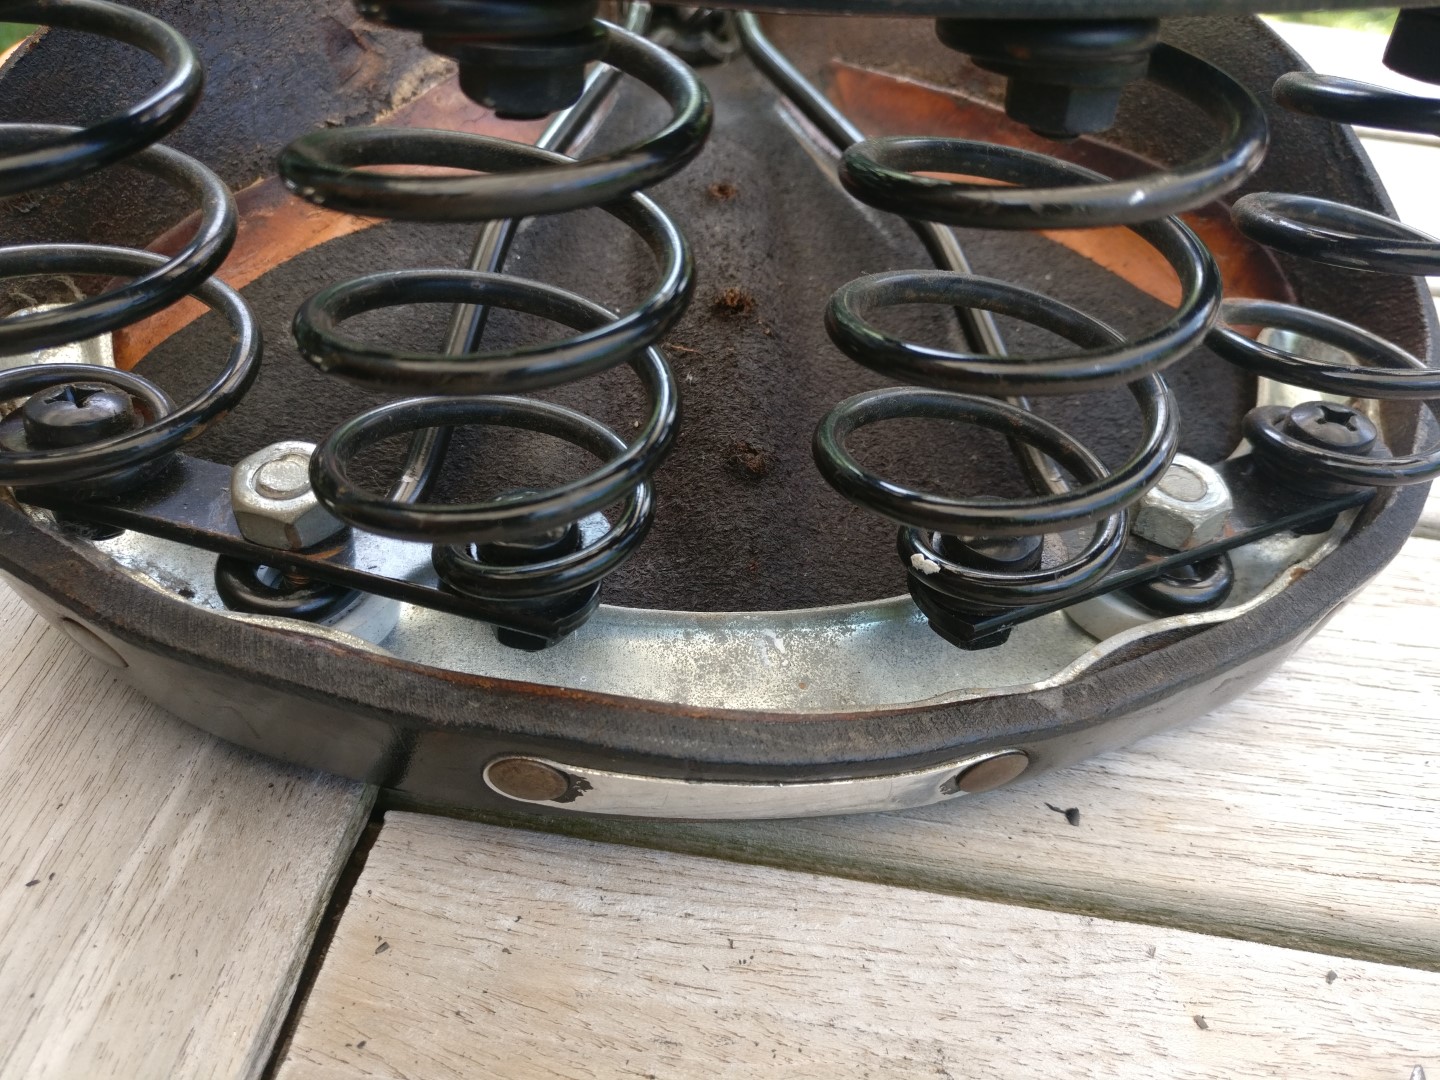
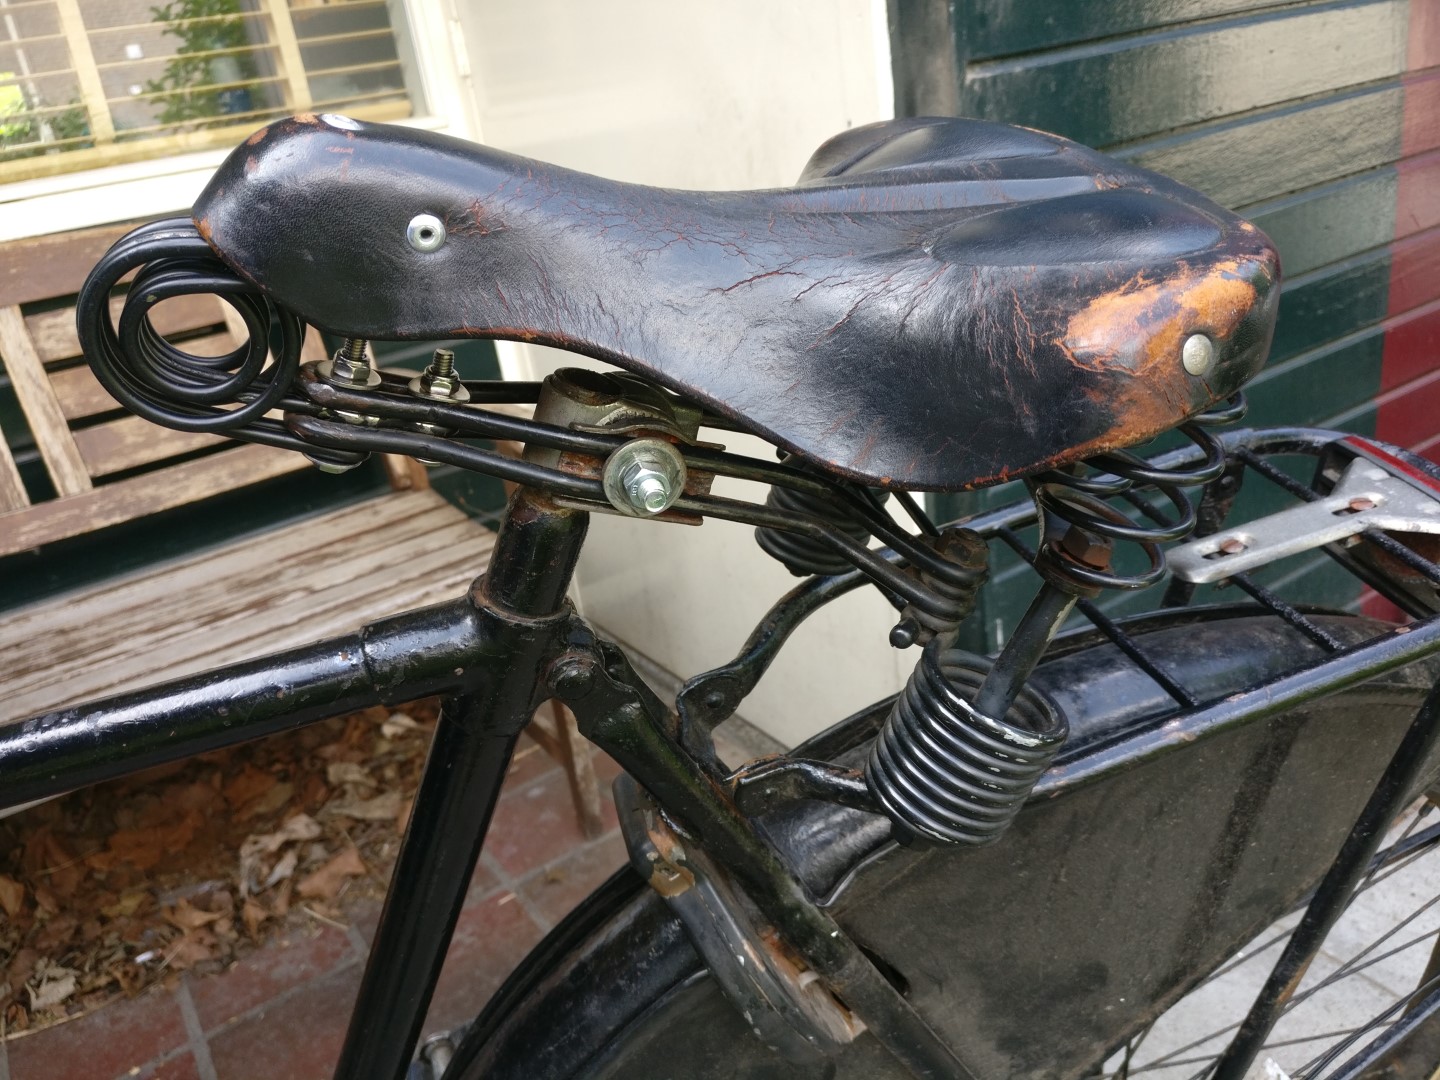
Aaaah, a Lepper Primus saddle! One of the best saddles ever made. I got one on my Gazelle transport bike from 1940. It is loaded with 4 springs at the back with an additional two as main shock absorbers, a double coiled spring at the front and a perfectly formed leather surface. It looks like a space craft from the ’50’s, but sits like a fresh spring meadow with lush green grass.
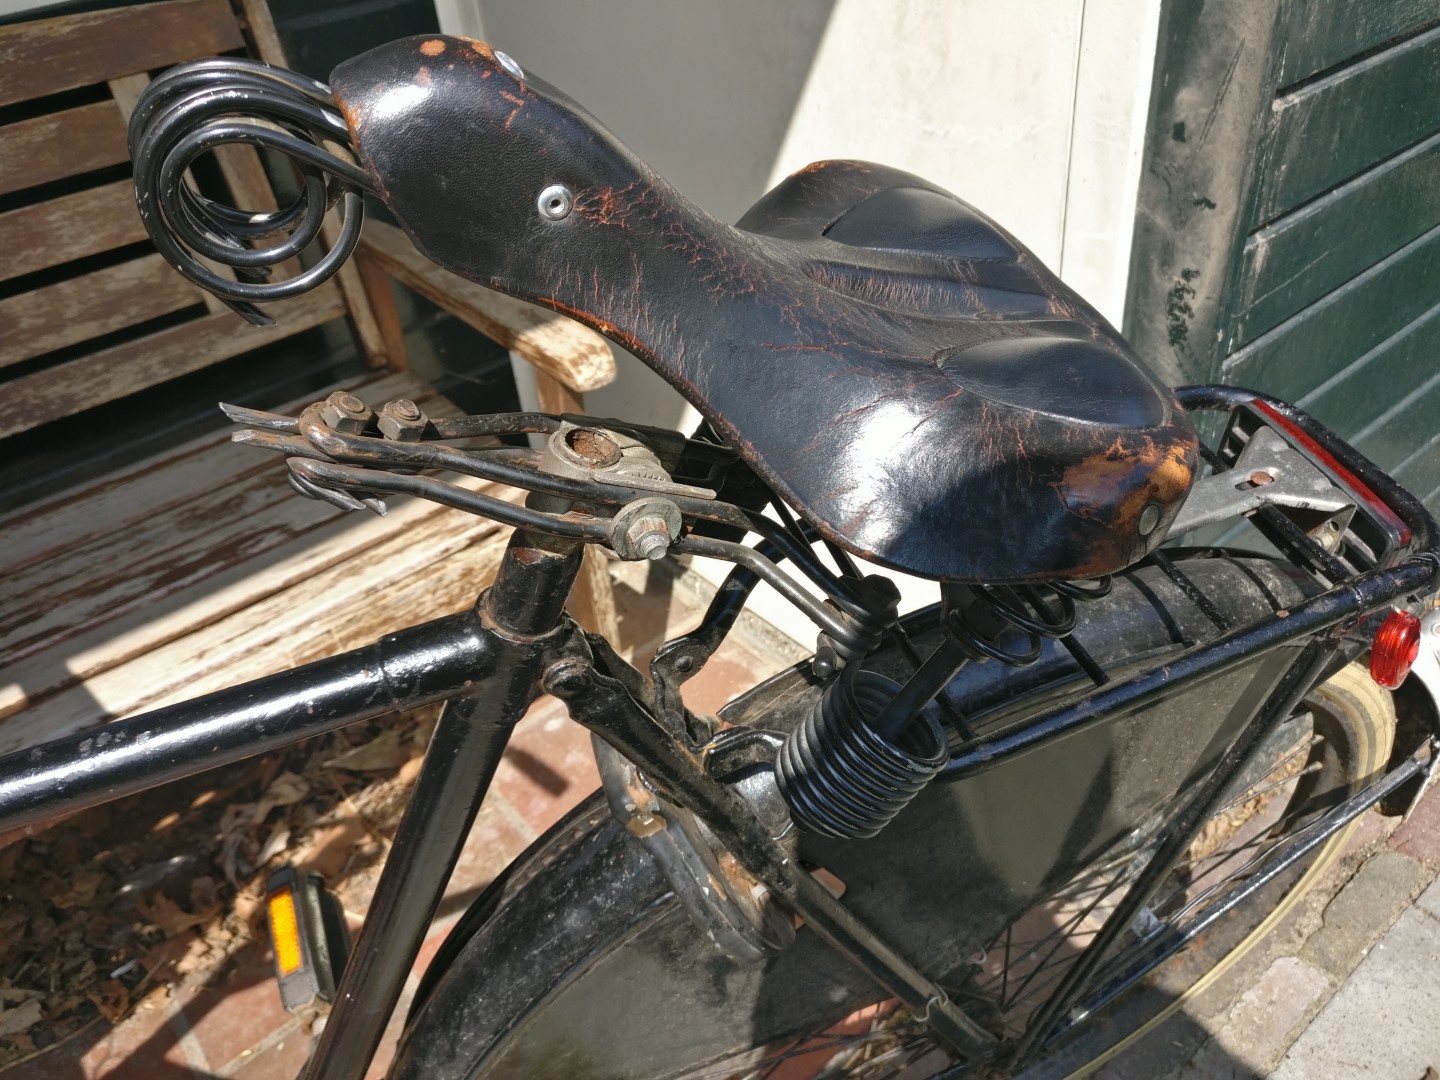
Unless, of course, the front spring is broken off. Doesn’t happen a lot, but if it does the soft saddle turns into a mean monster that bites your soft butt cheecks. So, mine needed to be fixed!
Original Lepper Primus saddles aren’t that hard to find, take a look at local Craigslist (in my case Marktplaats) and you will easily find one fitting your needs. But, I loved *my* saddle. So spare parts were needed. And I stumbled across a totally new front spring, ready to be fitted on my lovely saddle. Replacement wasn’t as easy as I hoped, but with this manual it should be doable. here we go.
First, remove the saddle the old fashioned way. But when your bike is old and stubborn, the central tube can be painted / glued / rusted up to the frame. To avoid stress, I removed the saddle by removing the central end at the top of the saddle tube. Like this:
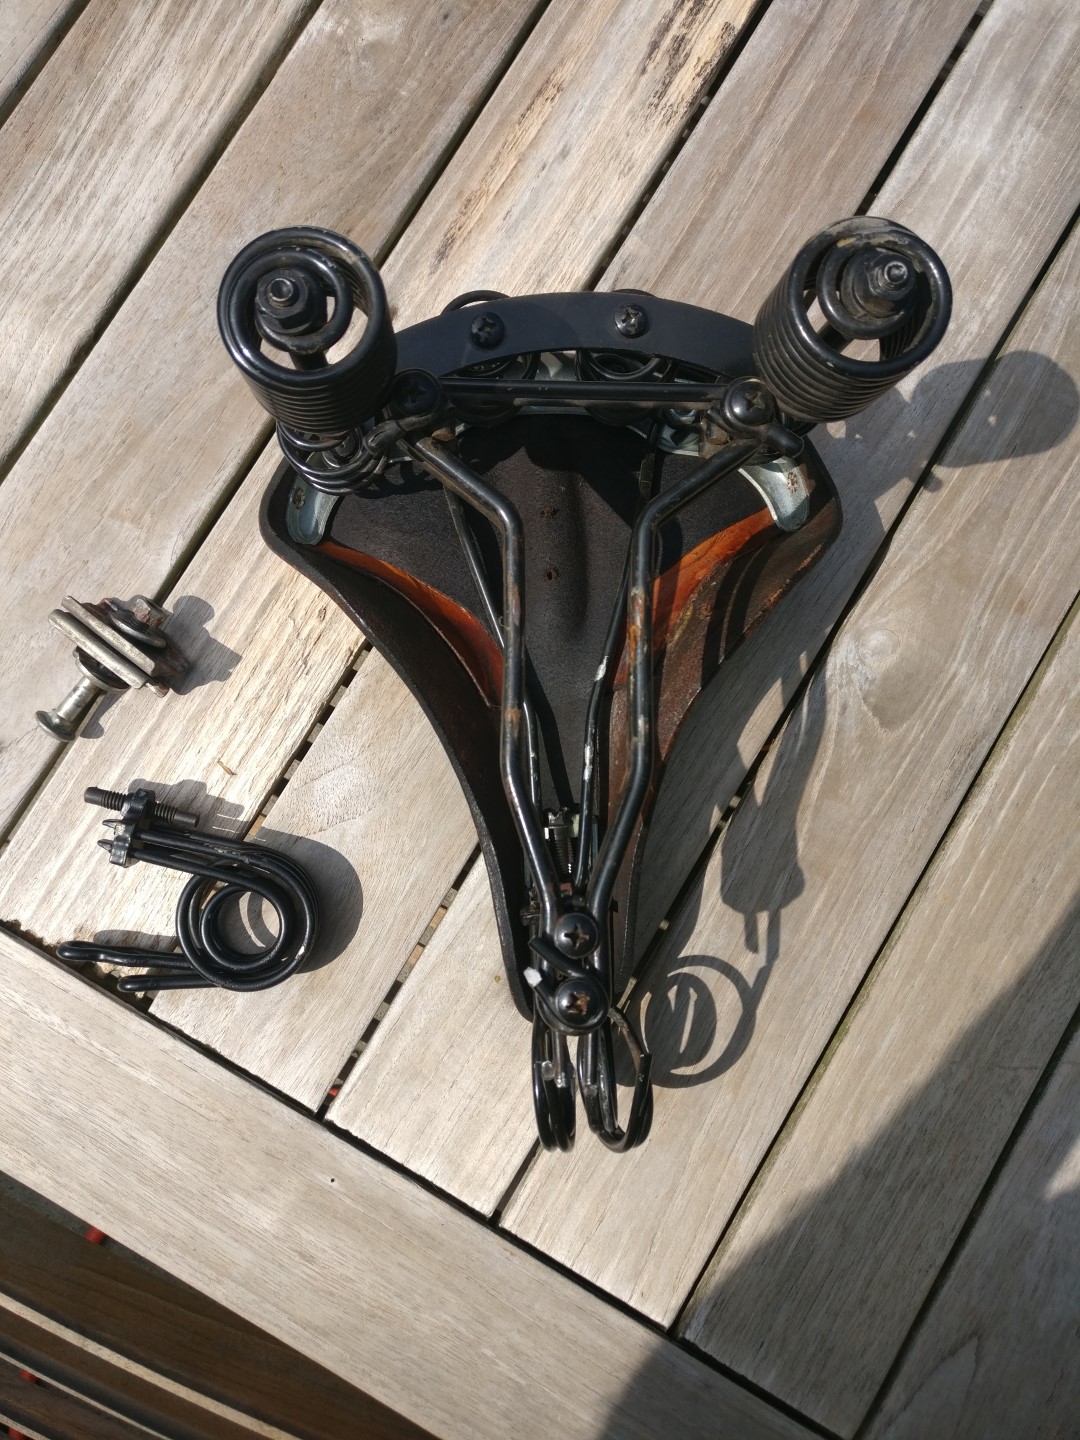
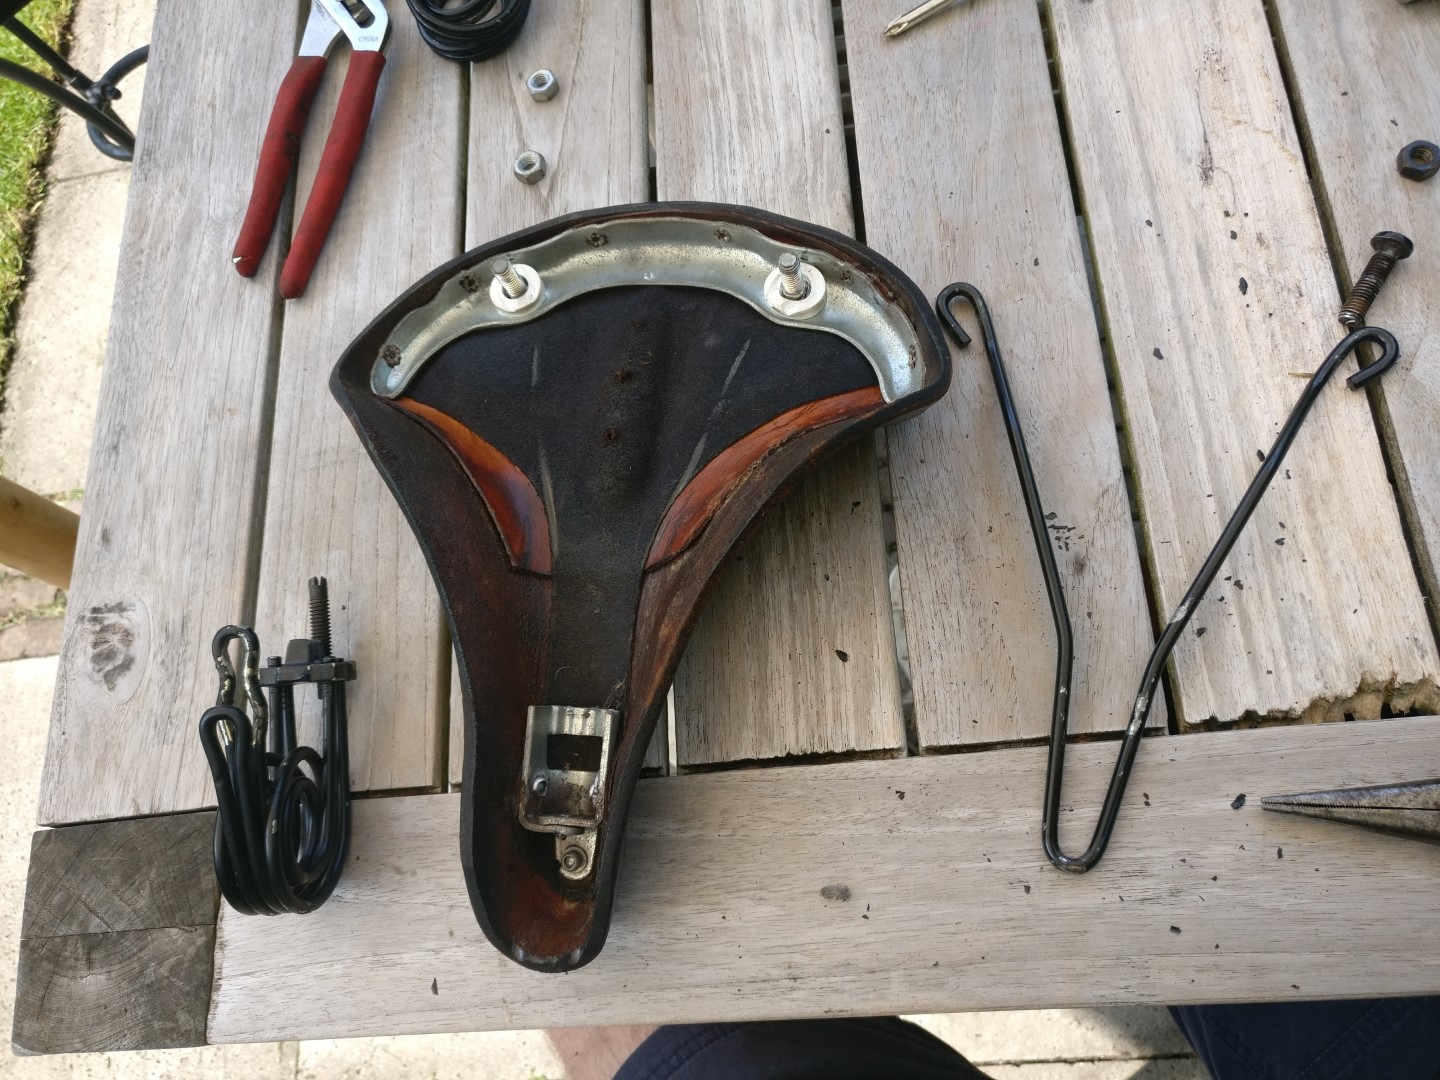
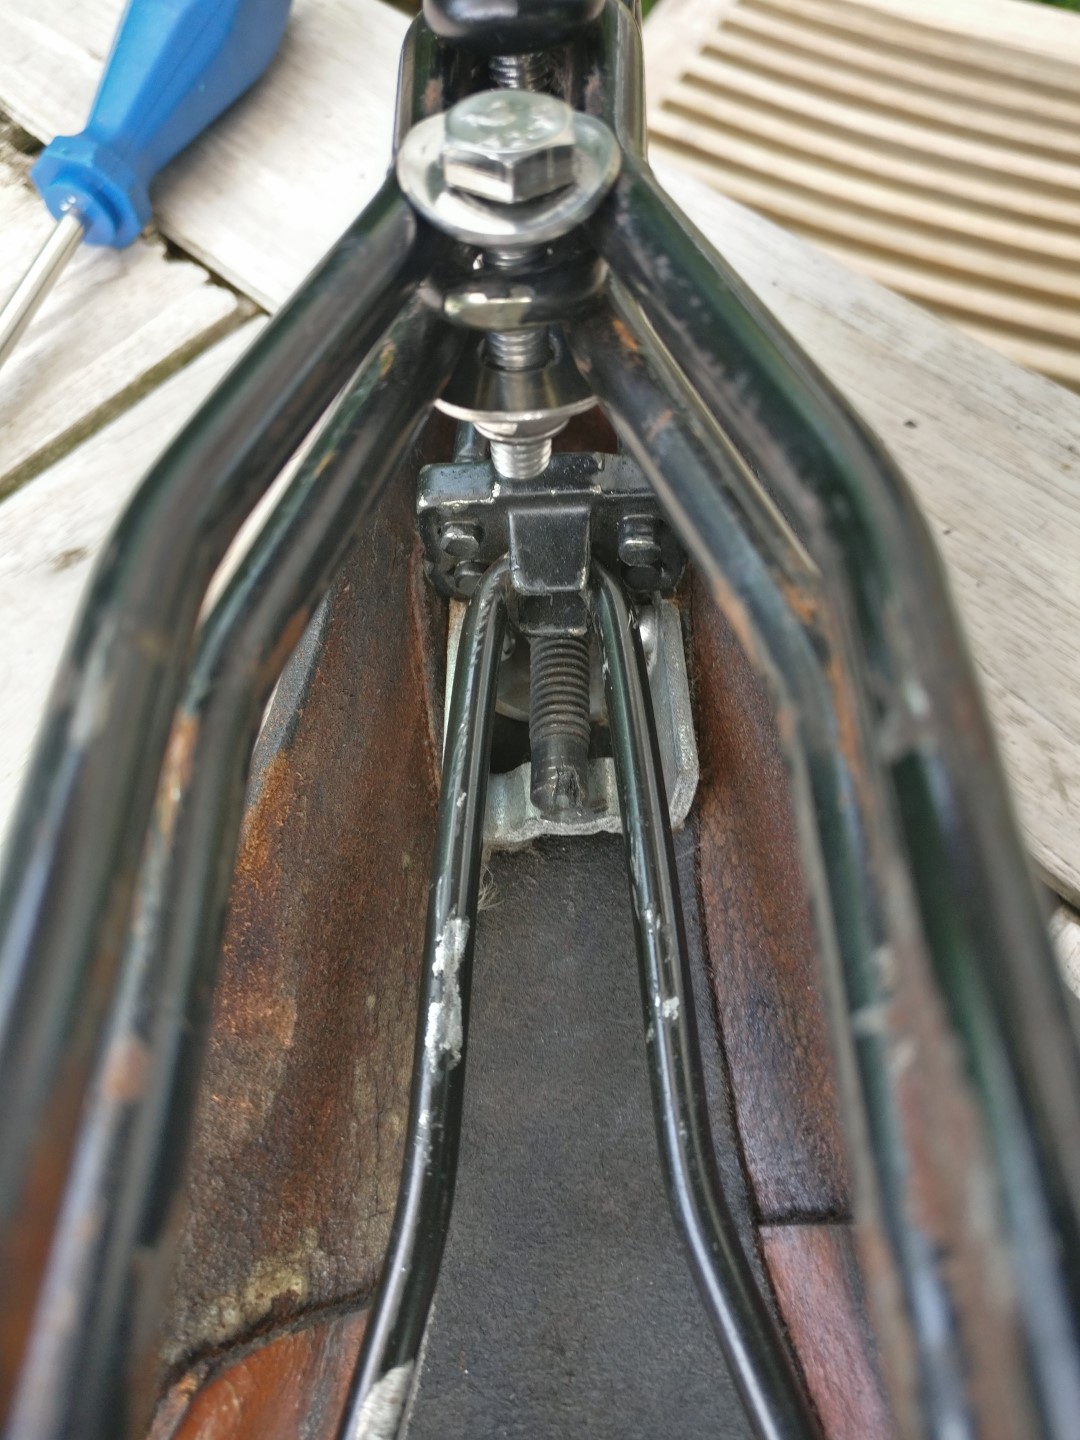
First job is to remove all old remains of the broken front spring. Remove the two Philips head screws and the metal remains. Mind that the two metal brackets may be kept apart by a screw driver to remove the metal loop that’s in between them.
Tougher part was removing the part with the tensioner, just beneath the leather. I couldn’t get to it, so I decided to remove all the metal structure. Remove the two nuts at the spring section at the back, and remove it from the leather part.
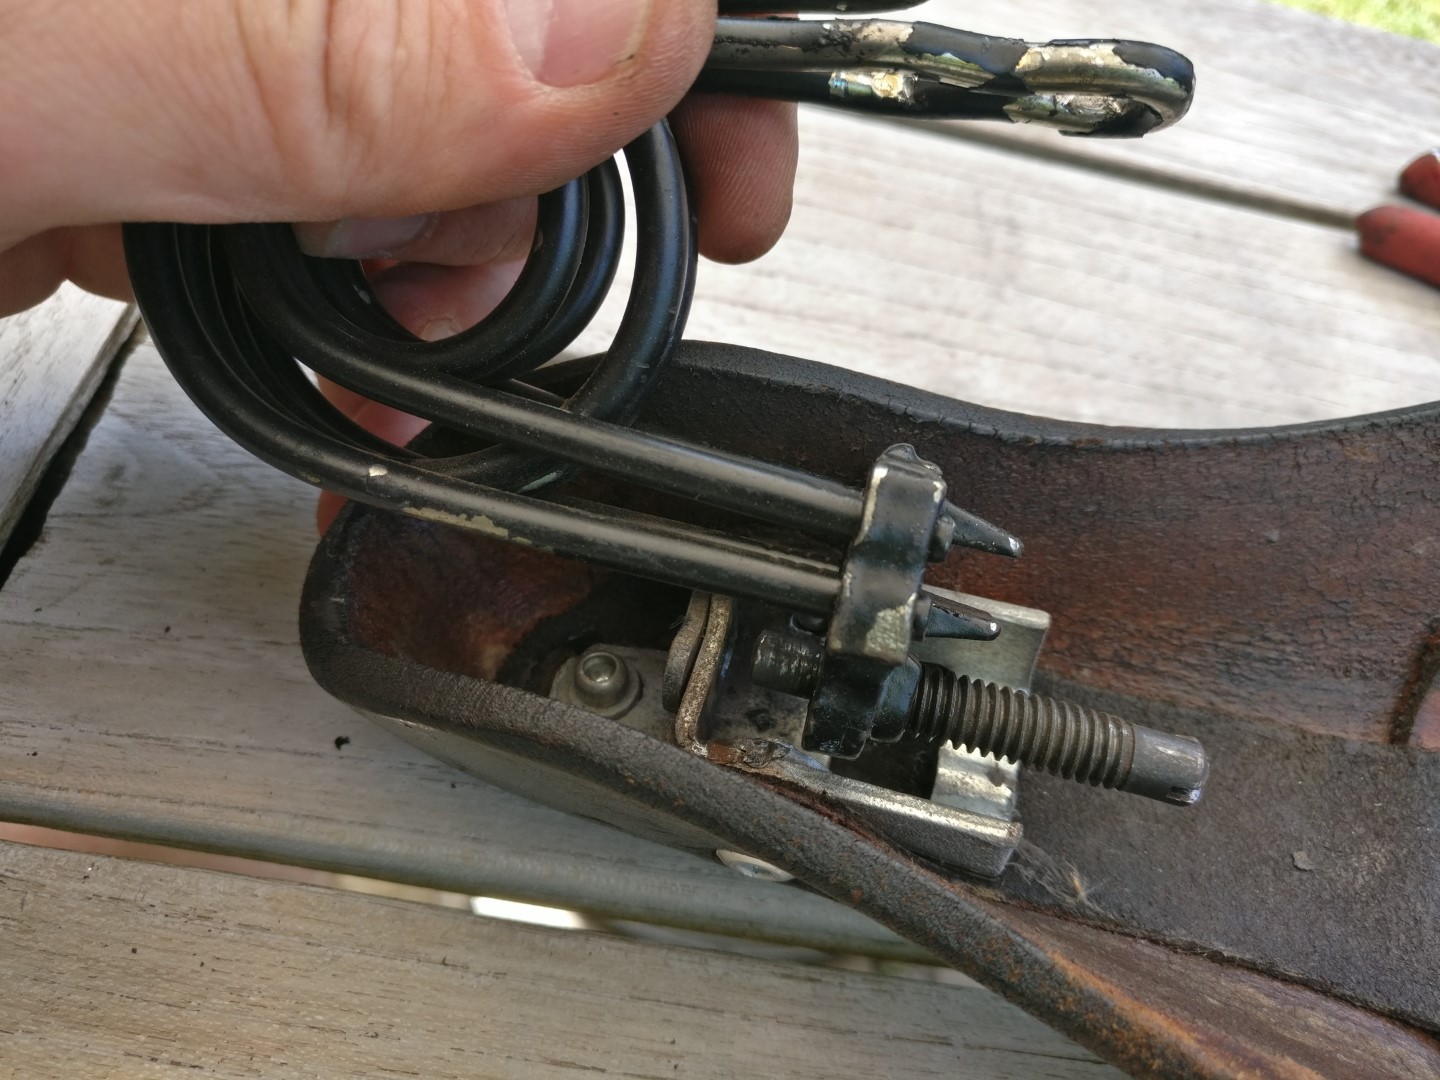
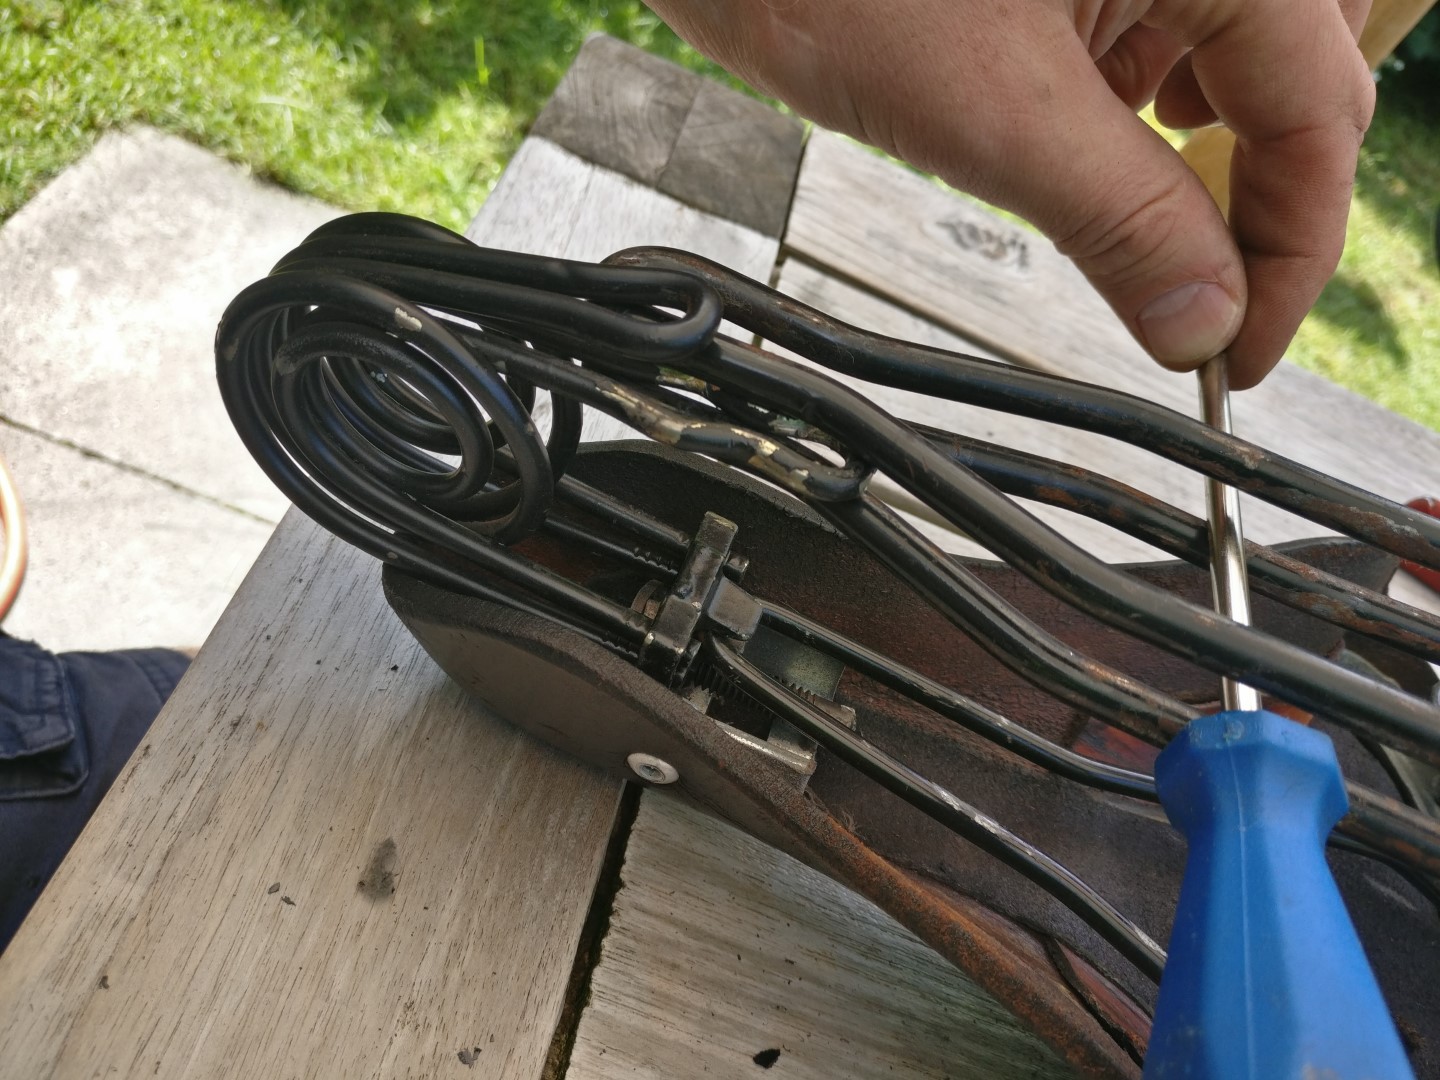
Then untighten the long tension screw, so it gets released from the bracket underneath the saddle itself.
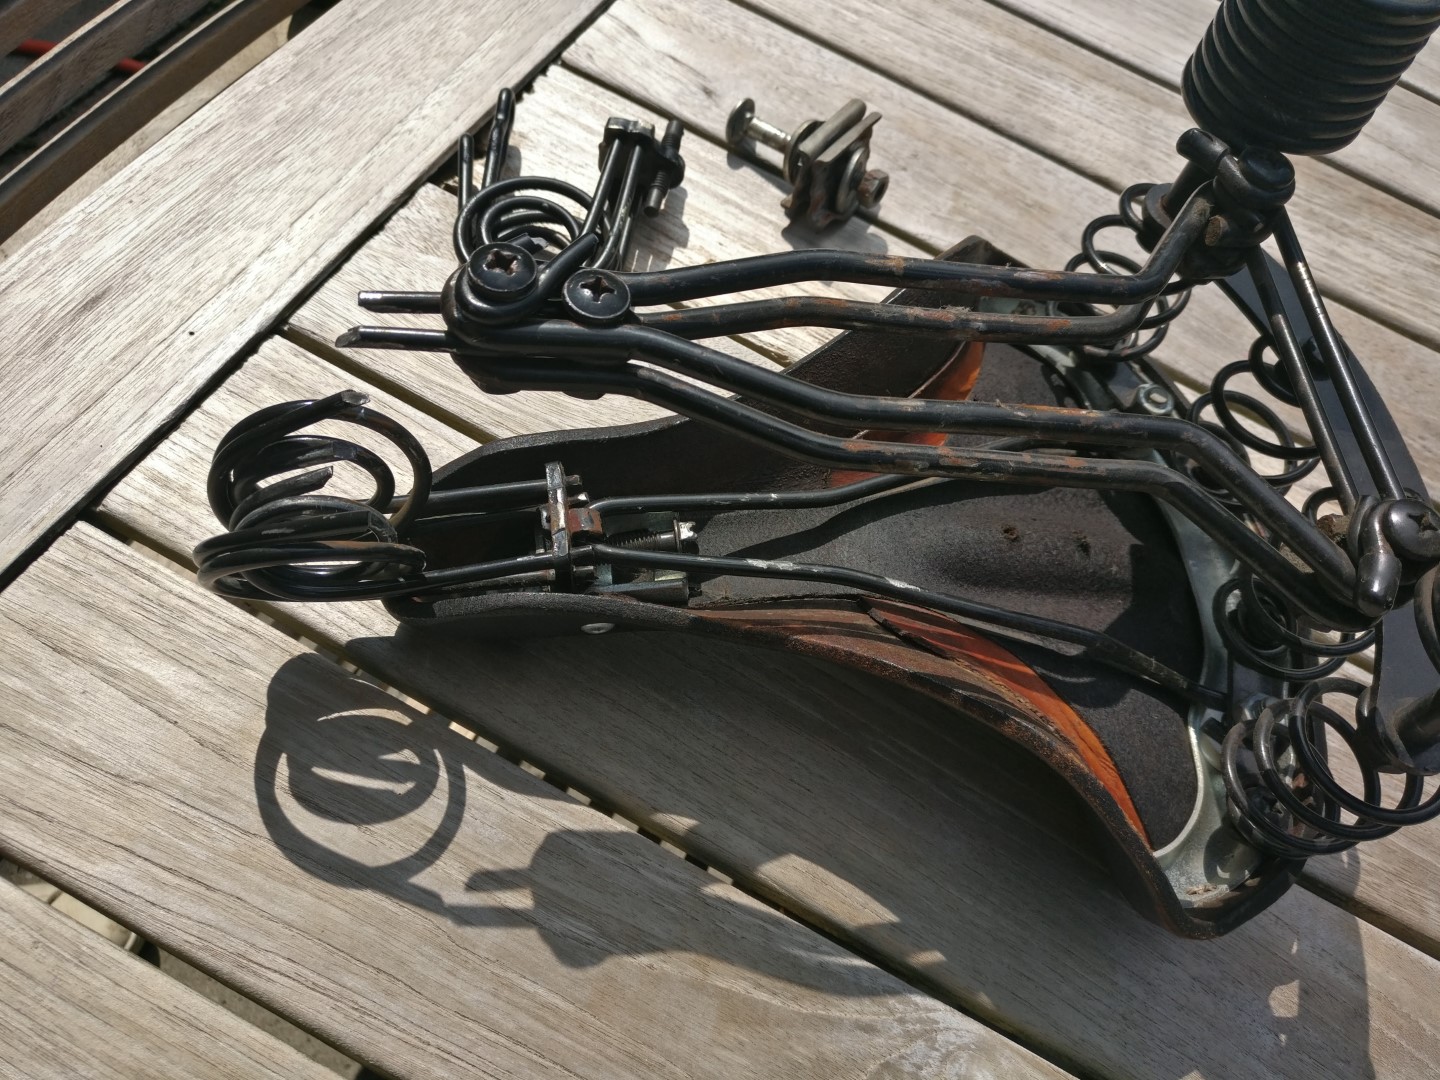
OK, ready to mount the new spring, starting at the mounting bracket underneath the saddle. Hook the new spring with the tension screw back into the opening at the bracket:
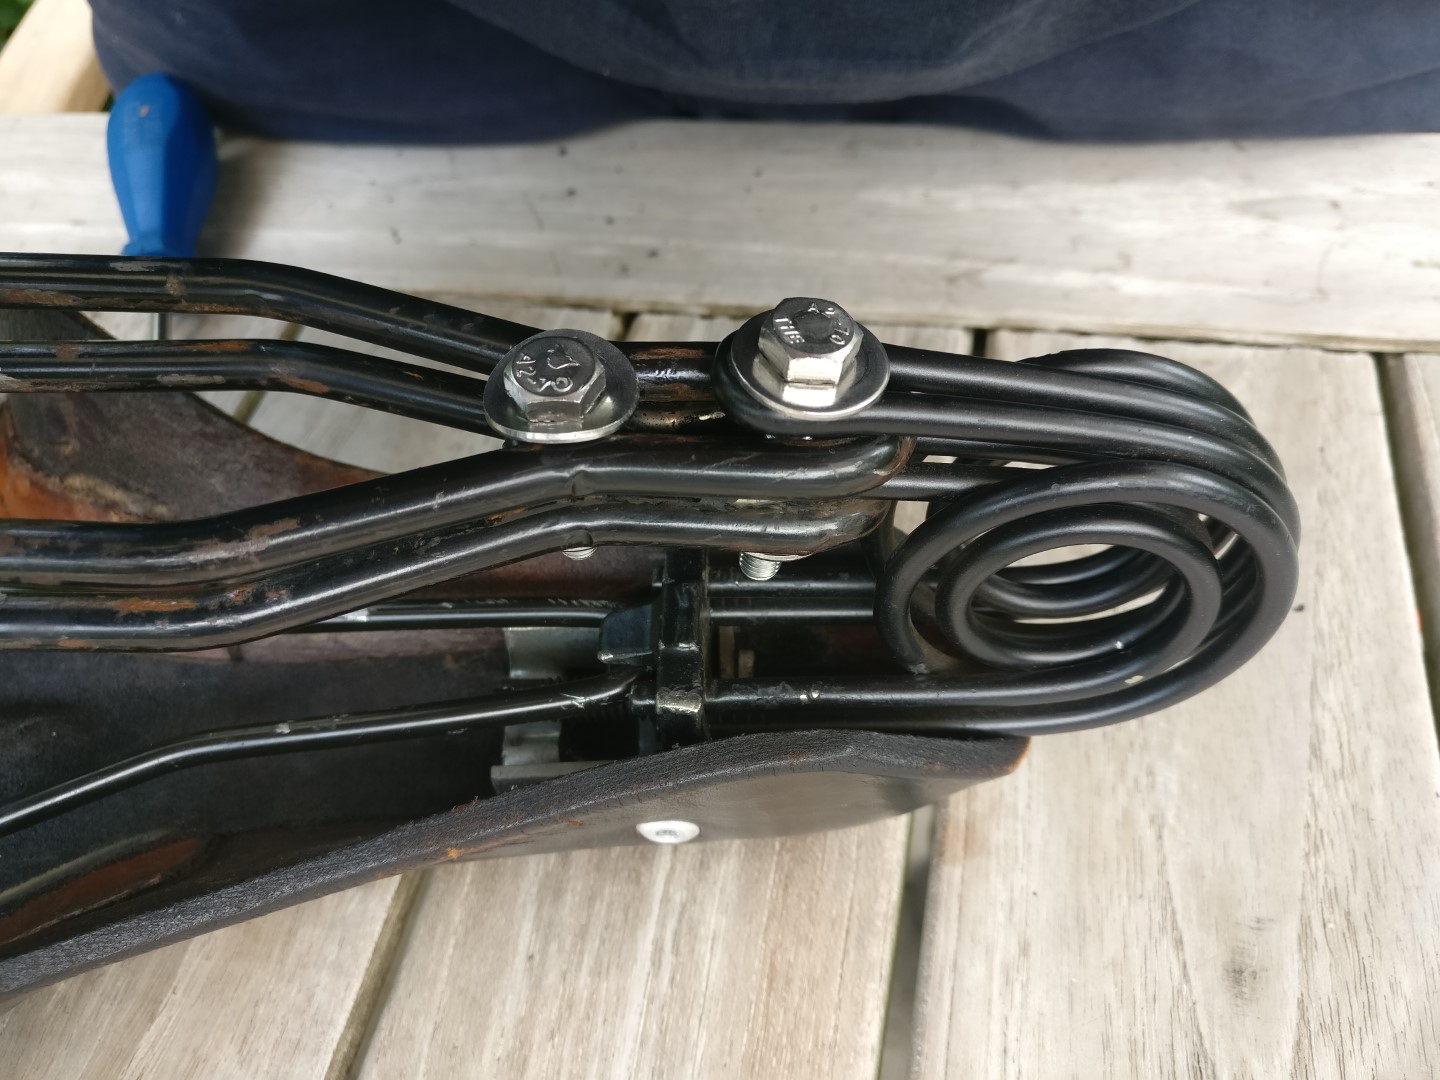
Place the Y shape bracket in the opening above the tension screw and onto the bolts for the springs in the back. Should look like this:
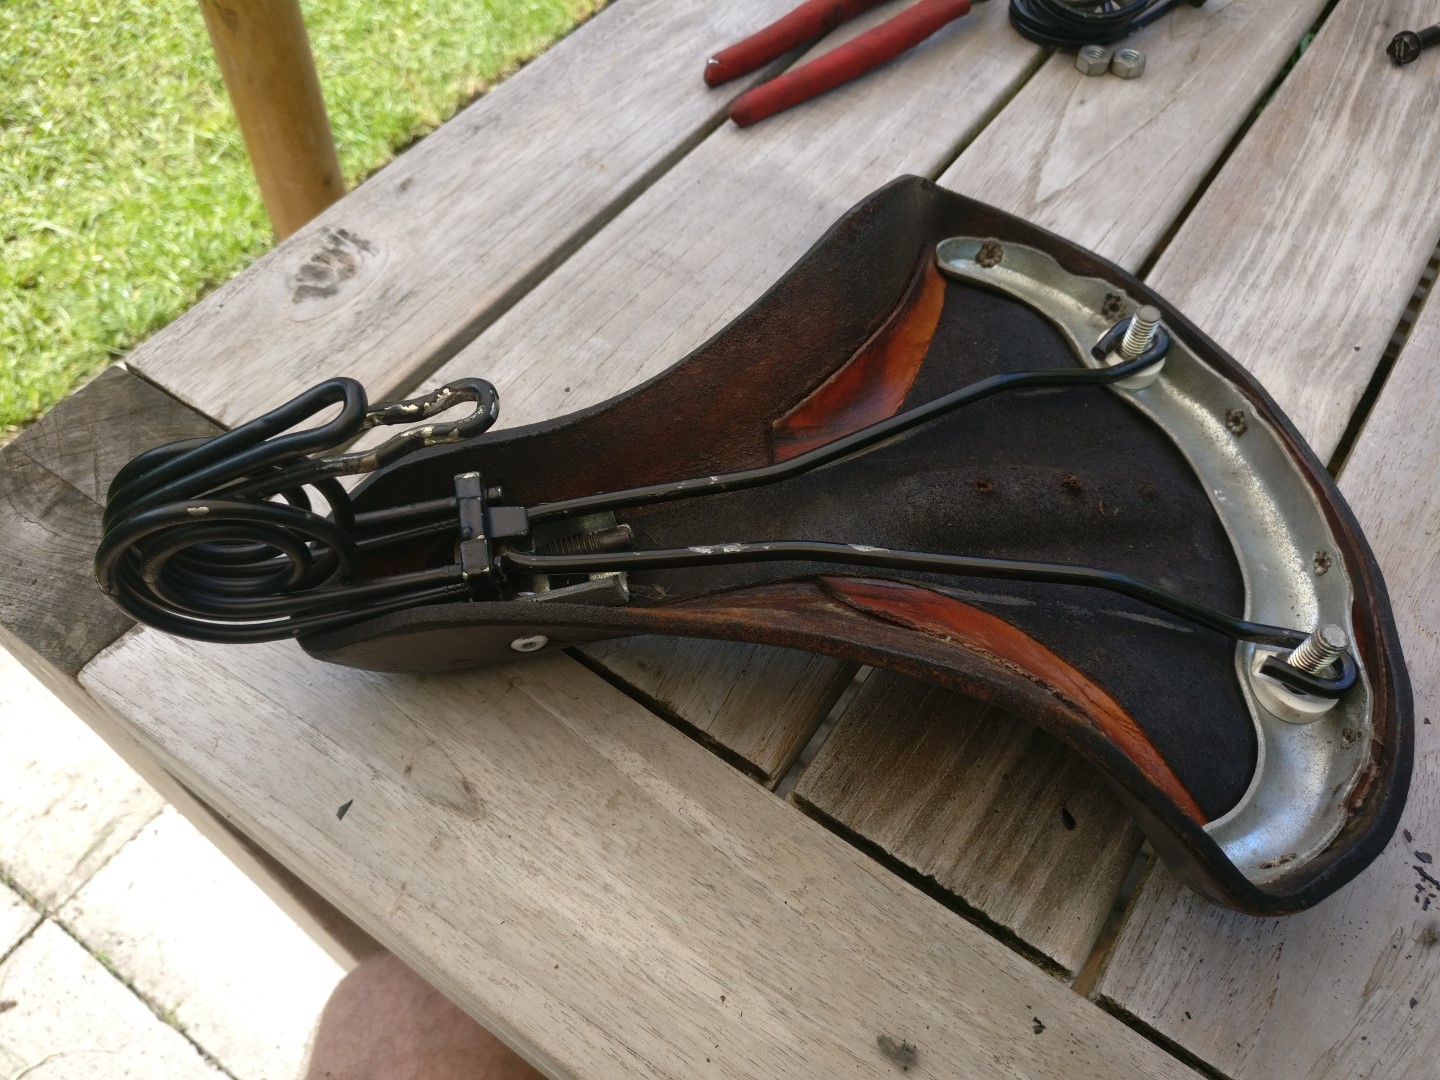
Remember to squeeze the opening where the bracket fits in, so it can’t slip out easily.
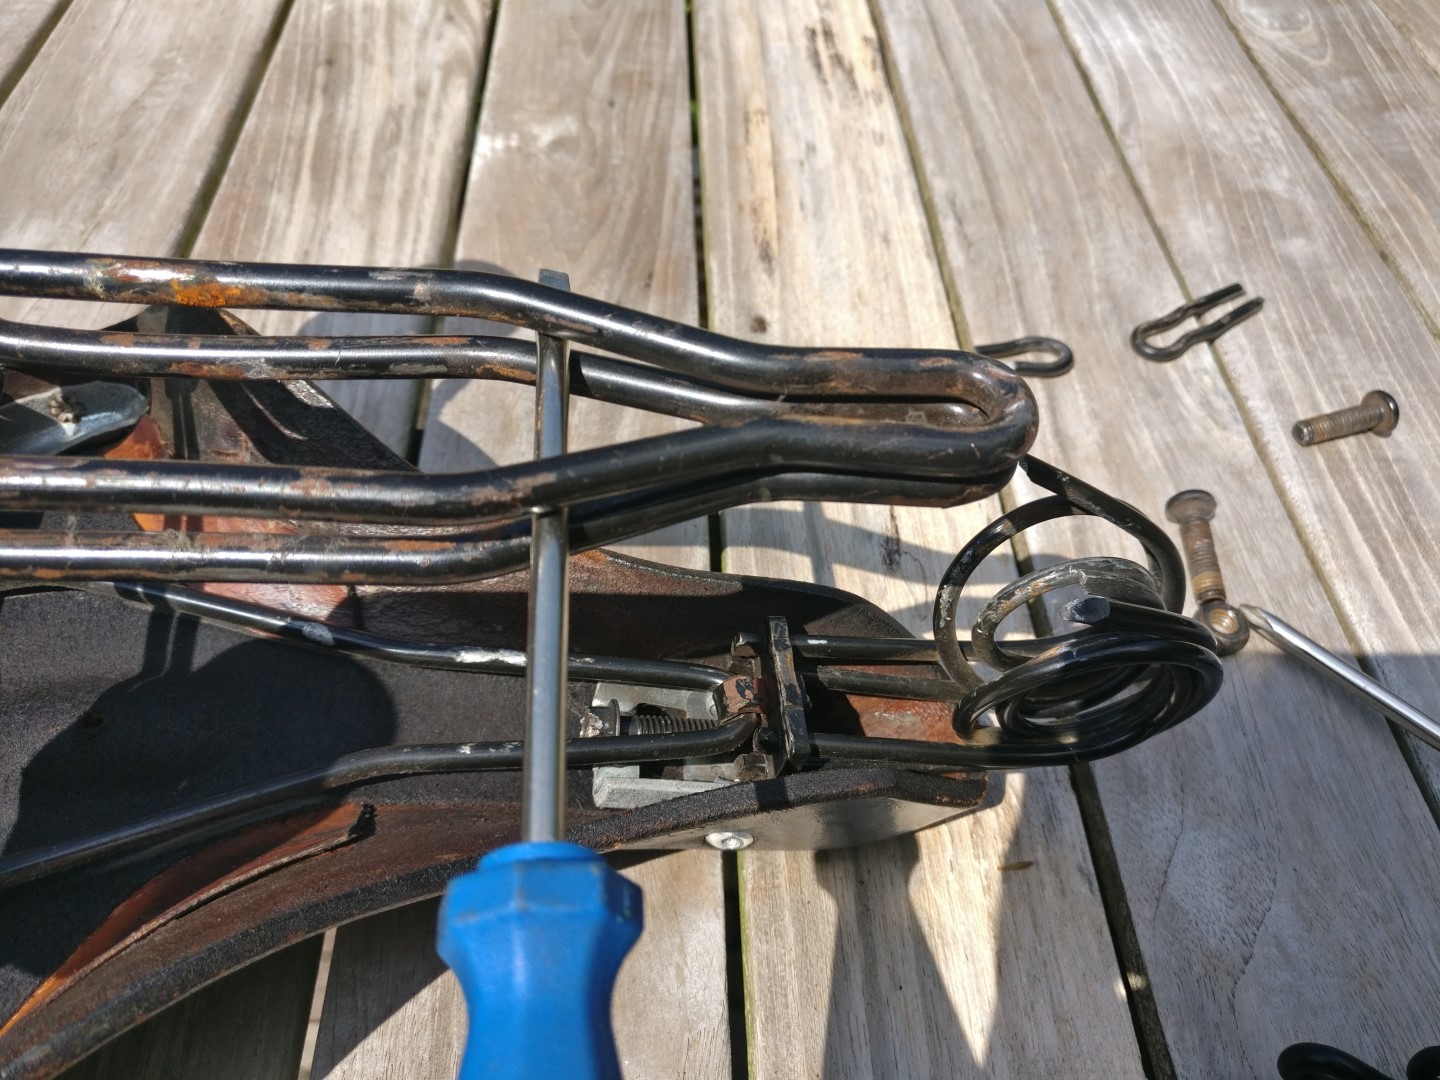
Now, moving back to the front, use again a screwdriver to open up the two brackets to squeeze the loops from the new front spring in:
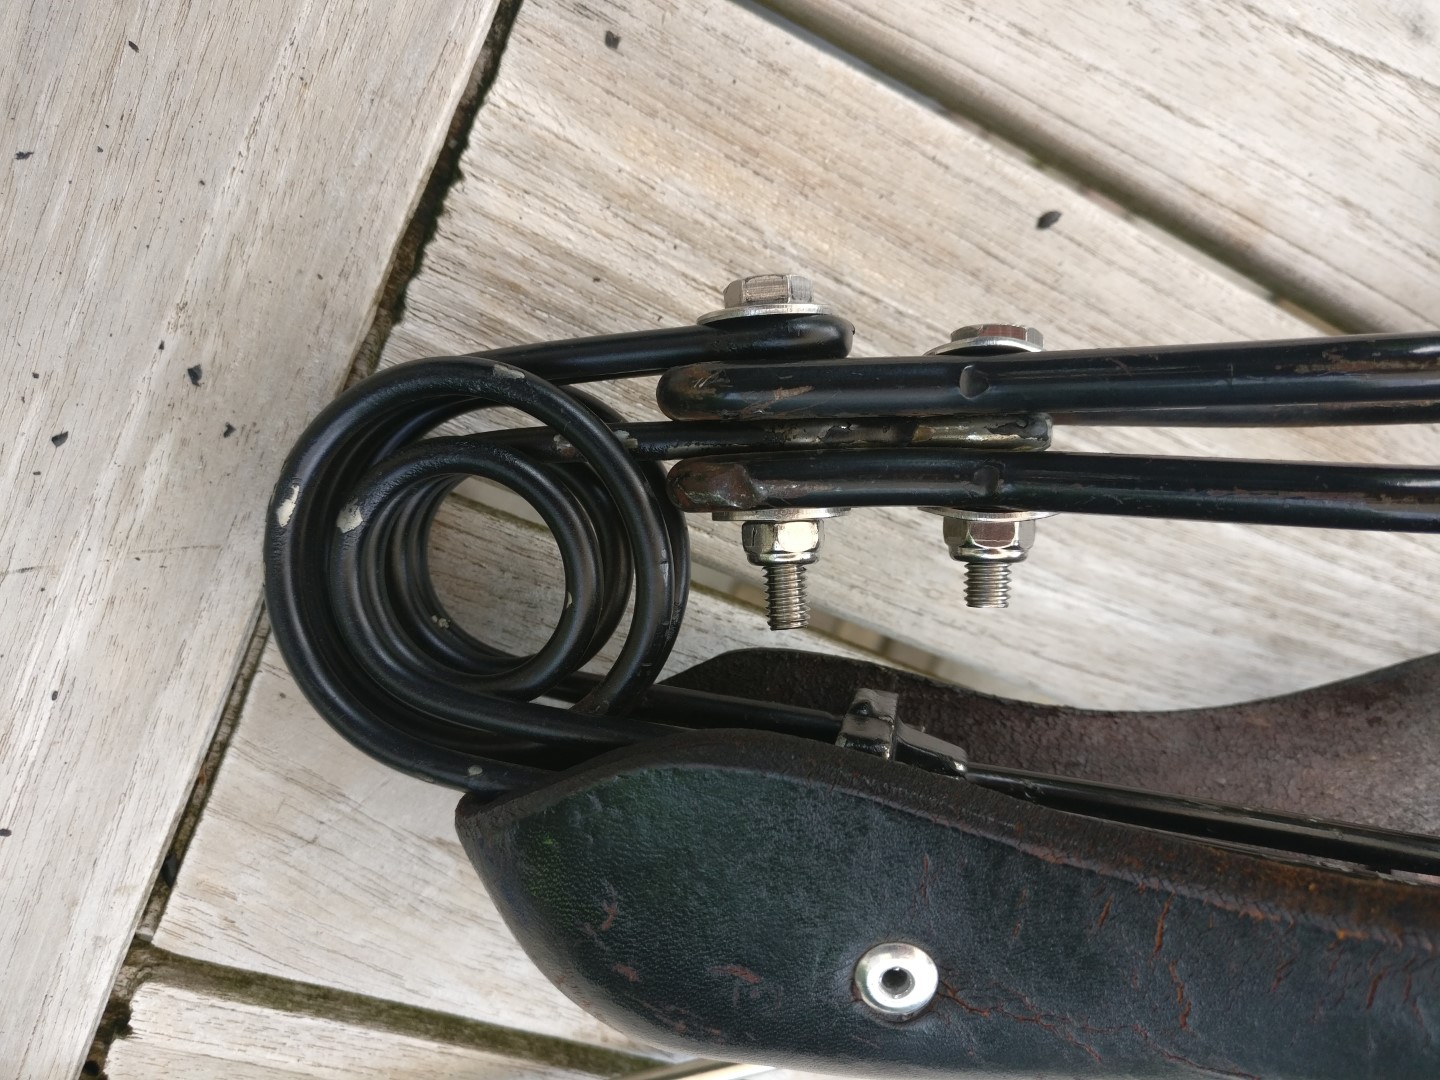
Now the tricky part came: I wanted to use the old Philips head screws and nuts, but they were too short. Somewhere along the way there were some changes in front spring design, that required longer nuts to fix the front spring loops. So, two new ones used with new washers. Will be sprayed black soon:
So, if you did everything ok, should be something like this!
Like I said, tighten the opening that catches the metal bracket, and tighten the tensioner screw again to stretch the leather saddle to your desire
Mounting is the reverse of removal, so back in the saddle!
New front spring, good tension on the leather, good for another 70 years!